Get up and running with Synqly in just a few minutes.
In this tutorial, you will:
- Generate an Organization Access Token
- Create a test account
- Create an integration using the Mock Provider
- Make your first Synqly API request
By the end of this guide, you will have a working integration and be able to query data from Synqly APIs.
Make sure you have:
- Accepted your Synqly organization invitation
- Access to the Synqly Management Console
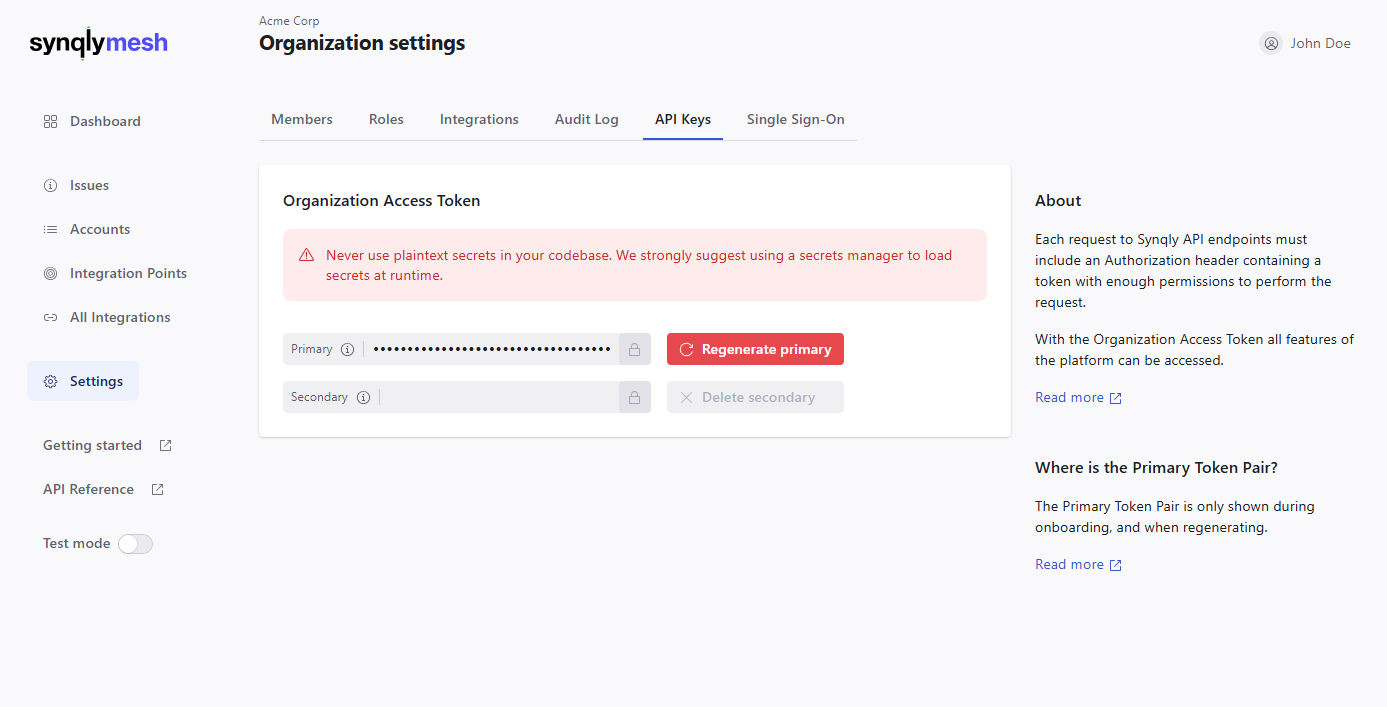
Your Organization Access Token is used to authenticate Management API requests.
- Sign in to the Synqly Management Console
- Navigate to Settings → API Keys
- Generate a Primary Access Token
- Store the token securely in your application configuration or
.envfile
For more information, see the Organization Access Token.
Create a Test Account that will own your integrations.
Run the following request using the Organization Access Token generated in Step 1.
- Synqlyhttps://api.synqly.com/v1/accounts
curl -i -X POST \
  https://api.synqly.com/v1/accounts \
  -H 'Authorization: Bearer <YOUR_TOKEN_HERE>' \
  -H 'Content-Type: application/json' \
  -d '{
    "environment": "test"
  }'
A successful response returns an account object similar to the following:
{
  "result": {
    "account": {
      "name": "~8a940e4c-1252-4569-bc82-542bb490c8bc",
      "id": "8a940e4c-1252-4569-bc82-542bb490c8bc",
      "fullname": "~8a940e4c-1252-4569-bc82-542bb490c8bc",
      "organization_id": "7f643487-0b9e-4721-92be-ae0470eda8ee",
      "environment": "test",
      "created_at": "2026-05-26T09:51:46.929847Z",
      "updated_at": "2026-05-26T09:51:46.929847Z"
    }
  }
}
Save the following value from the response:
result.account.id
You will use this Account ID in the next step.
To help you get started quickly, Synqly provides Mock Providers that simulate real product integrations.
Instead of connecting to an actual third-party platform such as CrowdStrike, you can use a mock provider to:
- Create integrations instantly
- Test API requests safely
- Explore connector behavior during development
- Avoid external authentication flows
In this example, you will create an EDR integration using the edr_crowdstrike_mock provider.
- Synqlyhttps://api.synqly.com/v1/integrations/{accountId}
curl -i -X POST \
  'https://api.synqly.com/v1/integrations/{accountId}' \
  -H 'Authorization: Bearer <YOUR_TOKEN_HERE>' \
  -H 'Content-Type: application/json' \
  -d '{
    "provider_config": {
      "dataset": "basic_v0",
      "type": "edr_crowdstrike_mock"
    }
  }'
A successful response returns:
- An Integration ID
- An Integration Access Token
Example response:
{
  "result": {
    "integration": {
      "id": "aa42f9fb-c32b-476d-9975-1099d1ab22e8",
      "account_id": "8a940e4c-1252-4569-bc82-542bb490c8bc",
      "category": "edr",
      "provider_fullname": "[MOCK] CrowdStrike Insight EDR",
      "provider_type": "crowdstrike_mock"
    },
    "token": {
      "access": { … },
      "refresh": { … }
    }
  }
}
Save the following values from the response:
result.integration.idresult.token.access.secret
You will use the Integration Access Token to call Connector APIs.
You are now ready to make API requests using your Integration Access Token.
Since this tutorial uses the edr_crowdstrike_mock provider, the integration exposes data models related to the EDR (Endpoint Detection and Response) category.
In the following examples, you will query:
- EDR Endpoints
- EDR Applications
These APIs return mock EDR data from the Synqly platform, allowing you to explore the connector experience without connecting to a real CrowdStrike environment.
- Synqlyhttps://api.synqly.com/v1/edr/endpoints
curl -i -X GET \
  https://api.synqly.com/v1/edr/endpoints \
-H 'Authorization: Bearer <YOUR_TOKEN_HERE>'- Synqlyhttps://api.synqly.com/v1/edr/applications
curl -i -X GET \
  https://api.synqly.com/v1/edr/applications \
  -H 'Authorization: Bearer <YOUR_TOKEN_HERE>'
You should receive mock CrowdeStrike EDR response data related to endpoints and applications.
Now that you have successfully created your first Synqly integration, you can continue exploring: